 X10 for Overhead Lighting
When removing or installing light switches,
be sure to TURN OFF BREAKERS!
 X10SW01 - INCANDESCENT ONLY!
With this switch, the user can turn on and off, even dim and raise any overhead incandescent light fixture from the fhe ECU. No wire nuts needed.
(X-10 Kit Required)
Important: A NEUTRAL wire is required to connect the X10SW01. Before ordering, please check your wall box for a NEUTRAL wire, usually found as a group of white wires capped by a wire nut and not connected to your existing switch. If this is missing, you will need to pull a neutral wire to that box. If you are missing the neutral wire you must use a professional electrician to have this switch installed.
 X10SW02
With this switch, the user can turn on and off fluorescent or incandescent light fixtures from the ECU.
(X-10 Kit Required)
X10SW03
This is the companion switch for X10SW02. Use this switch in conjunction with the X10SW02 for 3-way applications. (X-10 Kit Required)
X10SW04
With this switch, the user can turn on, off, and adjust the speed of a ceiling fan from the ECU. (X-10 Kit Required)
 Switch Set Up
Using a small screwdriver, pop the rocker paddle off the switch. Set the House Code dial to the same letter (A-P) that you set on the X-10 Transceiver. Set the Unit Code dial to an unused code (1-16).
Set the code in the REACH software to correspond.
X-10 Lamp Module
 Installation
Set the House Code dial to the same letter (A-P) that you set on the X-10 Transceiver. Set the Unit Code dial to an unused code (1-16).
Set the code in the REACH software to correspond.
Next, plug the lamp into the Lamp Module, plug the module into a wall outlet. Make sure the lamp switch is in the on position.
IR Lamp Dimmer
Installation
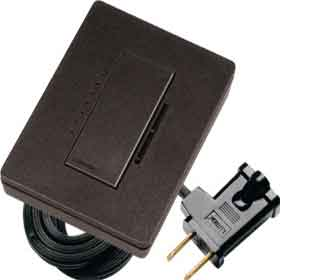
Find a suitable location for the lamp dimmer. Place it in a convenient and accessible location.
1. Turn the lamp ON and unplug the lamp cord from the receptacle
2. Plug the lamp cord into the back of the dimmer's plug
3. Plug the lamp dimmer into any standard wall outlet
4. Operate the lamp dimmer.
Installation Notes:
-To avoid overheating and possible damage to other equipment,
do not use to control motor-operated or transformer-supplied appliances
-Do not use where total bulb wattage is less than 25 Watts or greater
than the dimmer's capacity (300W)
-Dimmer may not work with dioded lamps(Sylvania Designer 16 or Philips PAR-16)
-Dimmer may feel warm to the touch during normal operation.
-DO NOT use to control fluorescent lamps or touch lamps.
-For lamps with integral 3-way switches, the switch should be set to the
full on position
____________________________________________
Manual Operation
ON: Tap once to turn the lights ON to the preset level
OFF: Tap again to turn the lights OFF
FULL ON: Tap twice to turn the lights ON to full bright
DELAYED OFF: Press and hold to activate delayed fade to OFF.
As the switch is held, the LEDs will begin to flash. Each flashing LED represents 10 seconds of delay before the dimmer fades to OFF. The fade time can be set for up to 60 seconds).
PRESET LEVEL: Tap 4 times quickly to set the current light level as the preset level. The LEDs will blink twice indicating the preset has been locked. To unlock the preset, tap the switch 4 times quickly. The LEDs will blink three times to indicate that the preset has been unlocked.
____________________________________________
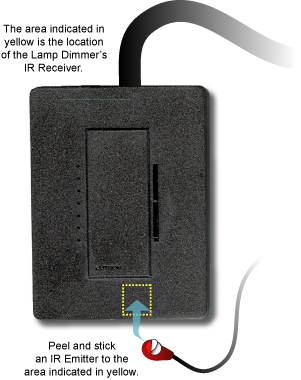
IR Placement
 ____________________________________________
Technical Data
- Dimensions: 2.45" (62mm) W, 3.23" (82mm) H, 0.96" (25mm) D
- Lamp dimmer cords are 6' (1.8m) long
- Local on/off and dimming control
- Lamp dimmers are intended only for use with table and floor lamps that do not
contain integral dimmers
RadioRA Lamp Dimmer
- Controls up to 300W/VA of incandescent or magnetic low-voltage lamps
- Minimum load on lamp dimmer is 10W/VA
|
|