 X-10 Kit
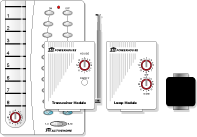 With the introduction of the X-10 Kit, the ECU can control lamps,
overhead lighting, ceiling fans, doors and more. Simply
plug the FireCracker into the back of the ECU, plug the Transceiver into any normal wall socket, and you have control of your lamps and appliances from across the room - or the other side of the house. Best of all, X-10 technology uses RF signals instead of IR signals, eliminating the “line-of-site” issues.
With the introduction of the X-10 Kit, the ECU can control lamps,
overhead lighting, ceiling fans, doors and more. Simply
plug the FireCracker into the back of the ECU, plug the Transceiver into any normal wall socket, and you have control of your lamps and appliances from across the room - or the other side of the house. Best of all, X-10 technology uses RF signals instead of IR signals, eliminating the “line-of-site” issues.
X-10 Setup Instructions
Plug the X-10 Firecracker into the the back of REACH.
X-10 should now be active.
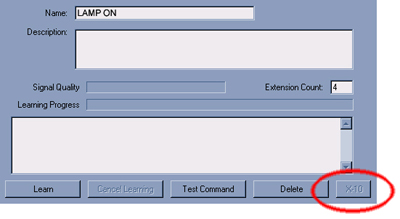
To use X-10, open the IR library, select a command under a device, and select the X-10 button in the bottom, right-hand corner. Select the house code, device code and the command you wish to activate. (If the X-10 button is not active refer to the trouble shooting section below.)
TROUBLE SHOOTING
STEP 1
You can tell if X-10 is active through the REACH Editor. Open any menu, open the IR library, and select a command under any device. In the bottom right-hand corner you will see a button labeled “X-10”. If this button is active and you are able to click on it, then the X-10 Transmitter is working. If this button is not active and you cannot click on it then the X-10 Transmitter is not working.
Refer to STEP 2.
STEP 2
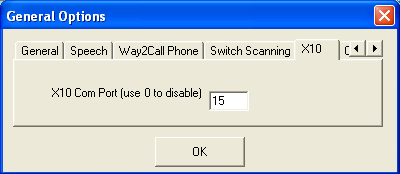
If the X-10 Transmitter is not working, check the Com Port within REACH. In the REACH Editor click on the “General Options” button in the left-hand toolbar and click the X-10 tab at the top. Make sure that the number 15 is displayed in the X-10 Com Port field. Refer to STEP 1 to check if the “X-10” button is now active. If it still is not active refer to STEP 3.
STEP 3
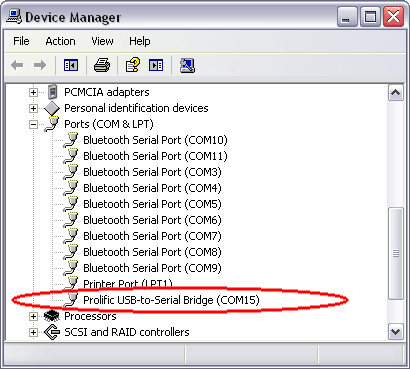
If the X-10 Transmitter is still not working the next step is to check the Com Port in the Device Manager. Click on “Start”, click on “Control panel”, and open “System”. Click on the “Hardware” tab and select “Device Manager”. Select “Ports” and look to see which Com Port the “Prolific USB-to-Serial Bridge" is using…typically it is COM15.
If it is using a Com Port other than COM15, remember the number and go back to Step 2 and enter the number into the Com Port field.
X-10 Lamp Module
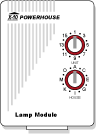 Dim and control incandescent table lamps,
floor lamps and other common household
lamps with the ECU.
X-10 Appliance Module
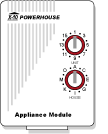 Works with fans, air-conditioners, dehumidifiers, coffee pots, and other appliances that use a 3 pronged grounded plug.
X-10 Universal Module
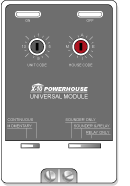 This module uses isolated contacts to control such low voltage devices as sprinkler systems, draperty controls, garage door openers, yard lighting, and nurse calls. It can be set for momentary or sustained contact closure, and has a built in chime.
X-10 Heavy Duty Appliance Module
 A plug-in module for controlling high wattage, 220v appliances such as water heaters, room air conditioners, ranges, etc.
Rated at 20 amps, 220v.
A plug-in module for controlling high wattage, 220v appliances such as water heaters, room air conditioners, ranges, etc.
Rated at 20 amps, 220v.
X-10 Socket
 A great addition to any X10 system. Control a lamp or light fixture, requiring an incandescent light bulb, from across the room or the other side of the house through the ECU.
|
|